Create a Raspbian SD card for your Raspberry Pi on Windows
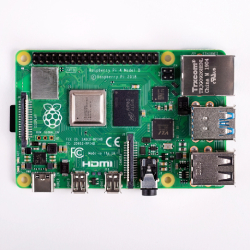
If you know a little bit the Raspberry Pi, you probably know that it’s delivered without any components. It’s meant no power supply, case, etc.
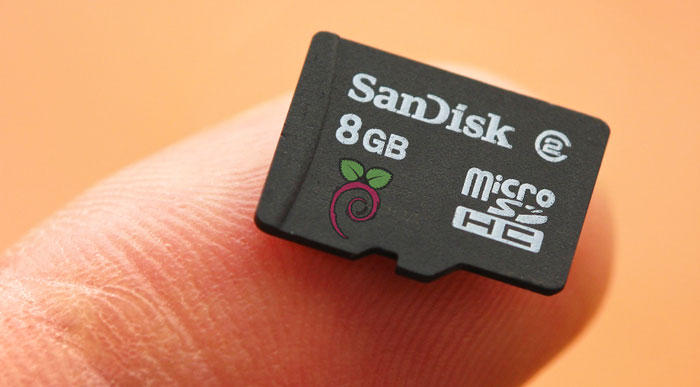
You may also know that the Raspberry Pi doesn’t have a hard drive. Instead of that, the Raspberry Pi uses an SD card as a hard drive, to be more precise since the Raspberry Pi B+ version, it’s a MicroSD card who is used.
For more information on MicroSD cards, power supplies, case, etc., you can check out our article about Raspberry Pi accessories.
Why I have to create an SD card for your Raspberry Pi?
Given that the SD card is a hard disk for the Raspberry Pi, we will install an operating system on it, here, we will choose the OS Raspbian, a robust distribution, suitable for the vast majority of uses and optimized for the Raspberry Pi.
It’s possible to find SD cards who already have on pre-installed OS, however these mostly run NOOBS rather than Raspbian like this one. NOOBS which will use more space than necessary and appear for us generally less stable than Raspbian OS.
Moreover, these cards are often of low quality and offer a reduced speed. We advise you to orientate you towards a fast and reliable SD card, like this kind of SD cards. In fact the performances of the Raspberry Pi will be strongly influenced by the quality of the SD card chosen.
The SD cards we recommend
In general, the choice of a good SD card can totally change your experience of the Raspberry Pi.
Indeed, the SD card is always called by the system. Therefore, if the card is slow the system is also slow. We advise you to choose one of the memory cards below. These are very high performance cards, with quite acceptable costs.
- For a small standard installation, choose a 16 GB card, such as this one.
- For an installation, more multimedia or log server, choose a 32 GB card, like this.
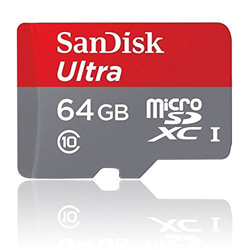
- For the ultimate installation with a variety of multimedia movies and movies, go for a 64GB card, that you can buy on amazon.
The files and programs needed to create the SD card
For the rest of this tutorial you will need to download the latest version of the Raspbian OS, which we will install on the SD card of your Raspberry Pi.
You will also need Win32DiskManager software, I let you download it here, and install it.
Note that you will need to be able to write on the SD memory card, which involves either a computer with a compatible port, or an external SD card reader who can be buy here.
Installation of Raspbian on the SD card of Raspberry Pi.
You should now have Win32DiskImager installed, and downloaded the latest version of Raspbian.
So you have a file zip archive of Raspbian OS, unzip it and you should get a « .img » file.
Insert your SD card into the drive of your computer, and once recognized, launch Win32DiskImager and click on the folder icon to the right of the « Image File » field.

Click on the folder icon.
This will open the file explorer, go to the « .img » file obtained a little earlier by unpacking the Raspbian zip file.
To the right of the folder icon, in the « Device » field, choose the drive corresponding to your MicroSD card, do not select the wrong reader !
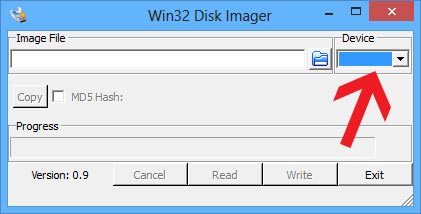
Choose your MicroSD card
Once done, click on the « Write » button, you will see the writing progress of your SD card.

Click on the « Write » button will start the writing.
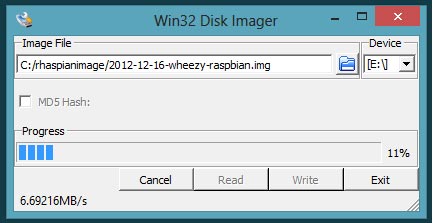
You can see the progress of writing Raspbian on the SD card of your Raspberry Pi
When the writing is done, the window displays « Done » under the progress bar. You just have to quit Win32DiskImager, and to eject your SD card !
Conclusion
Now, the Raspbian card is ready, you just have to insert it into your Raspberry Pi and plug it in. To continue, we advise you to take a tour on our tutorial dedicated to the first start of Raspbian !
You can also find our article about the choice of accessories of Raspberry Pi 3.
We hope that this tutorial will have been useful and that you will enjoy to play with your Raspberry Pi!